
All eyes have turned towards the US, and many of us are sat literally on the edge of our seats waiting for the results, though the anxiety is proving too much for me, so I’ve been trying to stay calm by keeping my mind occupied with other stuff — indulging in retail therapy (early Christmas shopping online), watching a live virtual bonfire 🔥👨🚒 held by our local fire service (they’ve just been showing us some clever work their rescue doggies do), and also some light crafting — anything that’ll make a change from spamming F5 on my browser! 😅
While armed protesters look like they are about to clash on the streets of American cities, it’s worth keeping in mind that we aren’t far off from a day that honours those who have died due to the violence humans inflict on one another. 😢
The winds of change seem to be blowing, and as Edward Lorenz once posited, the flap of a butterfly’s wings in one nation can send a tornado across the world (or something to that effect). Come Sunday, we might have a better idea of what the future holds. However, the UK will also be marking the end of this week with a two-minute silence at 11am, and then again on Wednesday. 🕊️
Most of us wear a poppy in memory of those we lost in WWI and WWII…usually a brooch or pin (though I also have a couple of beautiful scarves 🧣 that I bring out this time of year), but there are also other ways to commemorate the war dead.
Why not make a poppy pinwheel? It won’t take long to do, and it’s a great activity if you want to give your kids a more interactive experience whilst they’re learning about Armistice Day.
For each pinwheel, you will need:
• Two Red / White* Squares of Paper – Coloured both sides
• Green Paper / Straw / Pipe Cleaner
• Paper Fastener
• Black Sharpie
• Scalpel
• Scissors
• Hole Puncher / Pin
• Glue
*Some people prefer the white poppy as a symbol of peace, but others stick with the traditional red. The colour is up to you as it’s not my intention to make any political statements here. I’m sure there is room on our planet for a variety of beliefs.
A number of tutorials online recommend printing templates for pinwheels, but quite frankly they’re more faff than they’re worth and completely unnecessary (especially for young children). Here’s an origami trick that will speed things up…

Create an “X” on your square paper (mine was 15cm by 15cm) with the diagonal cross fold technique. The creases will act as guides when you cut along them, taking care to leave approximately 2cm (or roughly 1/2 to 3/4 inch) from the centre. It’s ok to just eyeball it as the cuts don’t need to be completely precise.

Next, round the left corner of each triangle flap. I used the first cutout as a template for the others. If you’re not completely happy with the curve, it’s easy enough to trim freehand.

Once the trimming is done to your satisfaction, poke a hole in the opposite corner (the pointed one) of each triangle with a tiny hole puncher, or if you haven’t got one, a pin will work just as well. Simply poke through and then widen the hole by gently wriggling the pin around. Also make a small hole in the middle where the creases meet.
Then blacken the tip of a paper fastener with your Sharpie or any permanent marker.

It’s now time to put the pinwheel together. Take a piece of the red / white paper and either clockwise or anti-clockwise, pull the pointy corners of each triangle towards the centre of the paper and layer consecutively so the holes line up.

Push the paper fastener through to hold everything together, and repeat the process with the other red / white paper. Secure the pieces in place by bending the ends of the paper fastener, then adjust the “petals” so they spread out evenly.

A pipe cleaner can be easily attached to your poppy head, though most people use straws for the stalks. We don’t have any disposable straws at home, so I just rolled up some green paper, glued the edge down, and using a scalpel, made a small incision through the top portion to insert the poppy’s paper fastener.
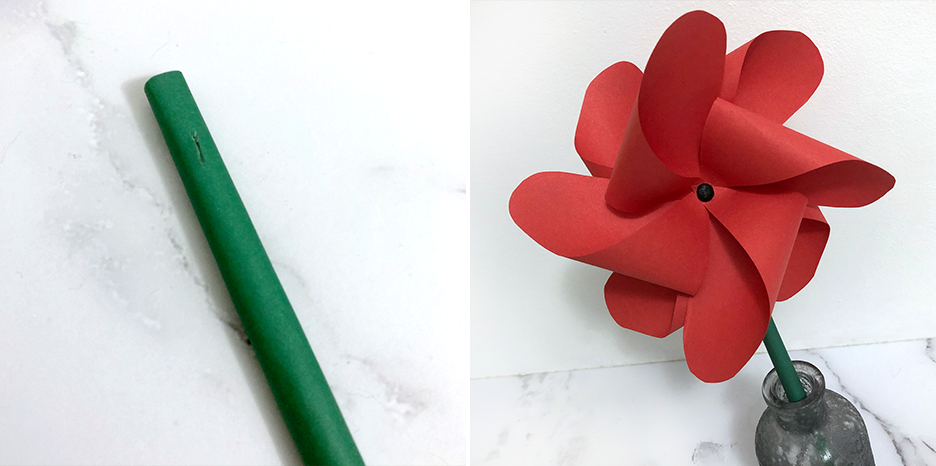
There you go…your poppy pinwheel is complete. You could make a row of them to display in your window, or omit the stalk and string a few “blooms” together to form a garland. Alternatively, reduce the size of the paper and make poppy badges.
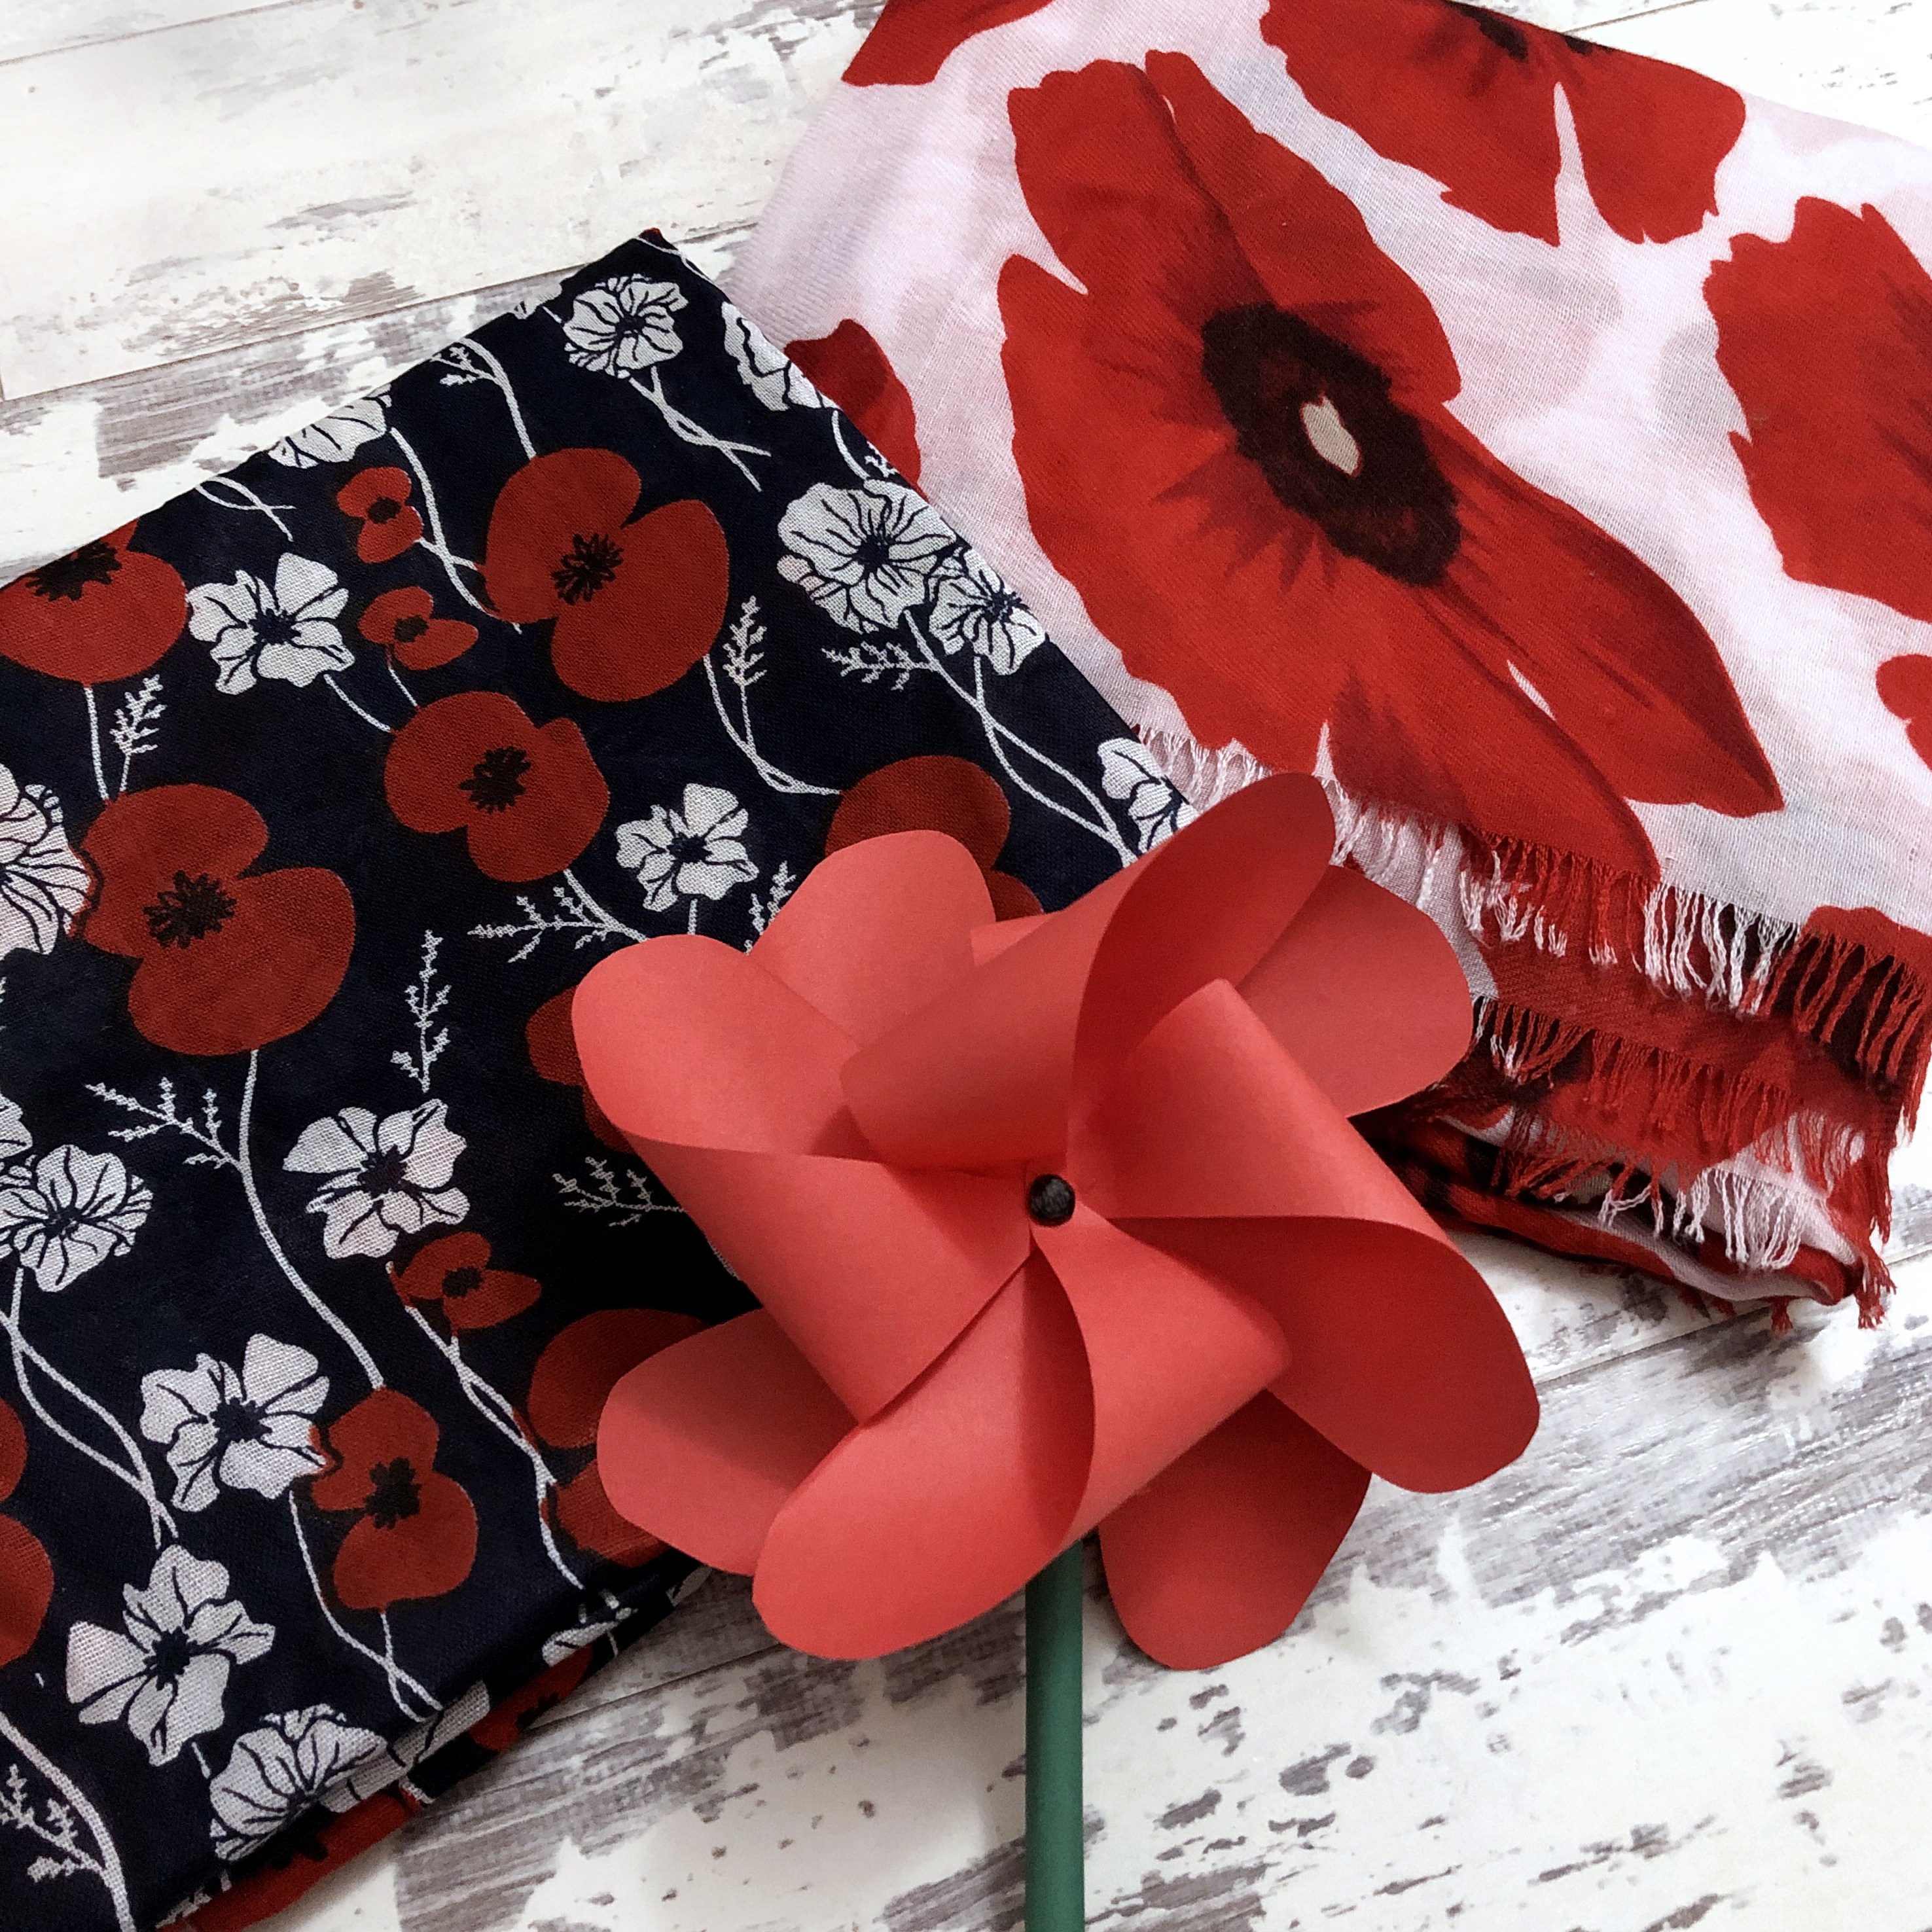
I only made one pinwheel, but there are so many ways to improvise. Hopefully, you had fun with this, and the rest of your weekend goes well. ❤️ In the meantime, it’s back to the nail-biting tension of election-watching for me! 🤞🤞🤞

Update 07/11/20 – I wrote this post when the vote count looked like it was going to last a couple more days, but I have just seen news that we now know who POTUS 46 will be. Congrats #BidenHarris2020! Well done! 👏
